
Now, the real business of gradually upgrading the car begins.......!
 Great fun to drill and tap the holes. By the end of it you become paranoid that the light is the only thing that's level, and everything else is slanted. Become one with the spirit (level).
 1) When gluing the carpet, you cannot have enough ventilation. We had both ends of the garage open, and I was wearing a mask with gas filter filtted, but I could only stay in the footwell for a few seconds at a time without being overcome by the fumes. It was very unpleasant, especially when you stand upright afterwards. Make sure someone knows you're in there!
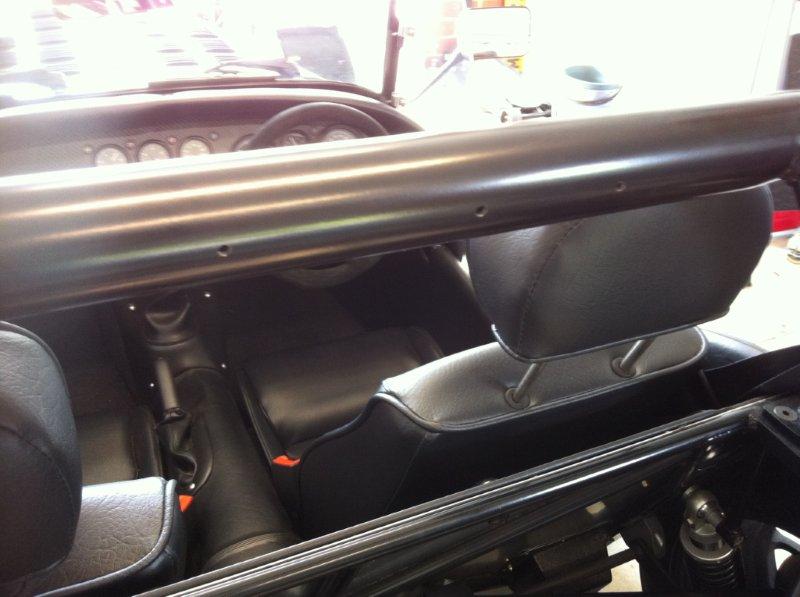
 2) The seats require holes to be drilled for mounting - take your time and allow space for the seatbelt stalks. Our engineer also required the headrests to be strengthened. A change in the ADR's means that they have to be higher, so we had them retrimmed and the mounting bars extended. This didn't bother me as in their original form, when positioned correctly for my head, they were only just inside the seat tubes - not much use if rear-ended by the 4x4 tanks round here! It also cost very little more than a scrap dealer was asking for second hand ute headrests.
 3) There's a hole at the back of the recess for the seatbelt retractor mechanism to sit in. You can't get a socket through it, so I pushed an extension bar through and manouvered the required socket around the side of the mechanism. You can just about get it onto the bar to tighten the retaining bolt, but not to be tried when feeling tired and cranky.
  4) On our chassis, the cross member that is attached to the top of the differential mount and that runs to the base of the roll bar mounting plate did not line up with the bolt hole for the roll bar. We found that you could use mole grips to clamp the boss against the lip of the roll bar mounting plate, thus allowing you to drop the bolt down easily. This can be done with the boot in place by removing a wheel and going through the wheelarch.You can just see the marks, despite having cloth wrapped the jaws. Where's the touch up paint?!


 We decided to place a small oil catch tank to connect vapour from the positive crank ventilation valve and the cam cover vent. This was bought from Car Builders Solutions who have supplied numerous bits and pieces during the build and who have always been extremely helpful over the phone and delivered very promptly. The unit is very small and the bracket was made simply by riveting an aluminium plate to two large hose clips which gripped the tank. The plate was shaped so it could be hose clipped to an adjacent chassis tube and the job was done. We ran the two vents via a Y-connector into the tank, and then ran the outlet of the tank into the the silicon hose behind the airfilter to remove excess vapour.

 This was pretty much our biggest fear. A perfectly painted bonnet which needed to be accurately cut for a complex 3-D shape to stick through, without stuffing anything up. I am not in any shape or form artistic nor talented with hand eye coordination. I once made a matchbox holder at school which consisted of 2 pieces of wood nailed together and I couldn't even cut that straight. Dad did keep it, but I think because if he had it, no-one else could ever see it.
 We made a template out of card to get a very rough form, leaving a lot of scope for expanding the hole later. We then used the dremmel for the initial cut, again keeping well within our markings and using lots of masking tape to protect against run away saws. Once we had this, we gradually expanded the hole using a metal file. It took a long time, mainly becauase I kept needing to lie down in a darkened room, but it did mean that we were in total control and could form the hole as desired.
 Its shape on the right hand side evolved as we went along, and was initially going to be a straight edge, but the curves fitted beautifully over the airbox and also exposed the "Reverie" label. It looks quite nice even if we do say so ourselves! We finished it with a rubber edging strip from Clark rubber and job done. I can sleep once more....

 We spent a while looking at options and designs of airbox. The main requirement was to fit under the bonnet without too much metal work so that we could mount the filter internally. This should mean a reasonably quite induction noise which will be essential to pass the noise emmissions test. We have been a bit worried about this element as I used to have a modified Peugeot 205 GTI which ran throttle bodies and sounded a bit like a canal barge trying to achieve earth orbit, even at idle. Fortunately A T Power (who supplied the throttle bodies) had a link to a company called Reverie, which makes among other things carbon airboxes in a multitude of designs. After much measuring up and head scratching we settled on a model that fits the bill, the Zolder 65 with shallow baseplate option.
 The next problem was mounting it - carbon fiber is not easy to cut, makes tonnes of very nasty dust and obviously is not cheap to replace if you get happy with the power tools. So we cut a template out of mdf wood to match the intakes and clamped it to the backplate. It was then straightforward to use a hole saw to make the apertures in the correct place and all was calm in the garage. It looks, although we are proud parents, bloody good....! We had to file down the quick release tabs so that they didn't stick up too far and then it was on to the next task - cutting the hole in the already painted bonnet. Eek!