Background


Of the many options and kits available we have chosen the South African Birkin - a kit which faithfully reproduces the beauty of Colin Chapman's original car and which you build up with component parts from the factory, adding in your choice of engine and transmission.


This holds true to the tradition of garden shed mechanics without requiring quite the level of welding skill, or CAD programming, that some of the amazing, home built clubman cars require. Or at least we hope not, as neither of us have done anything like this before.....


Sunday, July 1, 2012

Exhaust Heat Shielding

The first upgrade we planned was to heat shield the exhaust headers. I had been warned that there was some radiation from the headers into the footwell, but was not prepared for the reality. As the headers wrap around the drivers footwell they act like the element of an oven. Quite nice at first, but after about an hour's driving your legs start to poach. Any longer than that and in our car at least you can't touch the pedals without shoes on. I once reversed up the drive in socks after a bit of a fang and very nearly crashed. Not terribly smooth when trying to impress bystanders.....!
Our solution was to ceramic coat the exhaust headers and then to individually wrap each pipe in thermal lagging. We went for a black coating, which matches the rest of our metalwork, and have had the exhaust guard painted matt black too. Overall we love the finished effect - we've nothing against exposed metal as it looks fantastic as well, but we wanted a slightly different look.
The results are positive so far - there's still some heat but nowhere near as much. We've yet to take it for a really long trip as unfortunately the car is now immobile again (more anon) but it seems to have done the trick

Saturday, June 23, 2012

Registered!!

Well, we finally made it. Obviously it wasn't straightforward as, on a typical Melbourne day, we watched a weather front move in across the bay on the radar maps. We must have angered the Gods with our car's unnatural beauty. 45 minutes before the appointment at Vic Roads the heavens opened, wet weather gear was donned and off we went. It rained both there and back, but fortunately there was a space undercover for the actual inspection. The inspector was a very nice chap and clearly a car enthusiast and before we knew it we were the proud owners of a road registered, home built, mobile swimming pool!
It's a tremendous feeling and the drive home was fantastic. True, rain coats the inside of the screen as much as the outside due to turbulance, making the wipers decorative at best, and the semi slick tyres aren't the greatest when cold and driving through inches of water, but it was the most perfect drive I've had. It brings a huge smile just thinking about it now and needless to say all the effort to get to this stage is worth it for that moment alone!
Now, the real business of gradually upgrading the car begins.......!

Wednesday, April 11, 2012

High Stop Light

Great fun to drill and tap the holes. By the end of it you become paranoid that the light is the only thing that's level, and everything else is slanted. Become one with the spirit (level).
The only bright tip I have is that when routing the wiring through the roll bar, I grabbed an string off my trusty electric guitar to use as a mouse. It was flexible enough to pass through the curves, yet stiff enough to be pushed through in one go. Needless to say this brainwave occured after I'd spent an hour trying to drop weighted lines through. Ho hum......

Interior, Roll Cage and seatbelts

Not terribly exciting - however I do have a few tips to make things go smoother. Apologies to those with proper skills - these are aimed at novices like ourselves!


1) When gluing the carpet, you cannot have enough ventilation. We had both ends of the garage open, and I was wearing a mask with gas filter filtted, but I could only stay in the footwell for a few seconds at a time without being overcome by the fumes. It was very unpleasant, especially when you stand upright afterwards. Make sure someone knows you're in there!

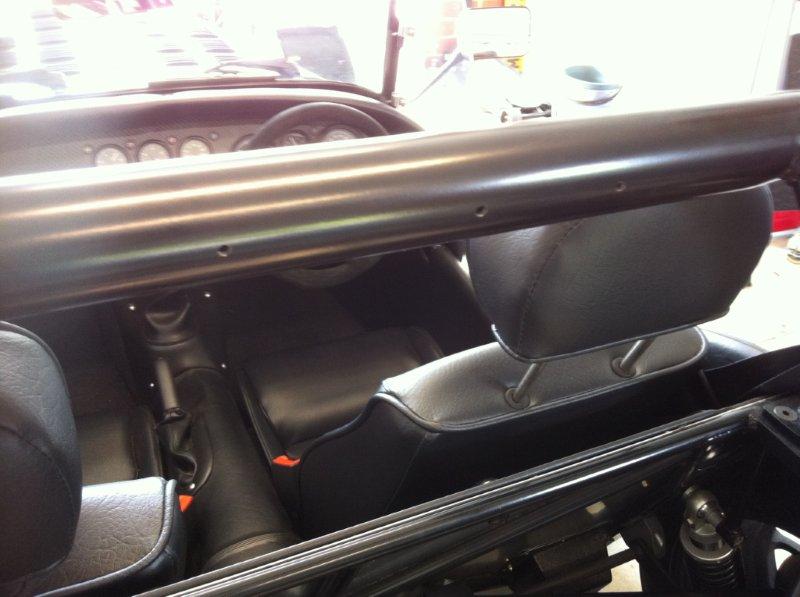
2) The seats require holes to be drilled for mounting - take your time and allow space for the seatbelt stalks. Our engineer also required the headrests to be strengthened. A change in the ADR's means that they have to be higher, so we had them retrimmed and the mounting bars extended. This didn't bother me as in their original form, when positioned correctly for my head, they were only just inside the seat tubes - not much use if rear-ended by the 4x4 tanks round here! It also cost very little more than a scrap dealer was asking for second hand ute headrests.

3) There's a hole at the back of the recess for the seatbelt retractor mechanism to sit in. You can't get a socket through it, so I pushed an extension bar through and manouvered the required socket around the side of the mechanism. You can just about get it onto the bar to tighten the retaining bolt, but not to be tried when feeling tired and cranky.


4) On our chassis, the cross member that is attached to the top of the differential mount and that runs to the base of the roll bar mounting plate did not line up with the bolt hole for the roll bar. We found that you could use mole grips to clamp the boss against the lip of the roll bar mounting plate, thus allowing you to drop the bolt down easily. This can be done with the boot in place by removing a wheel and going through the wheelarch.You can just see the marks, despite having cloth wrapped the jaws. Where's the touch up paint?!

Monday, April 9, 2012

Exhaust System

Our exhaust was made for us at Meridian by Rob. We got an old muffler (from a truck I believe) and attached this to a catalytic converter supplied by Cateran. The cat has a californian spec mantel - presumably signed off by Arnie himself - and is euro 3 compliant. It's maybe overkill, but along with Pauls tuning skills, it contributed to us passing the IM240 first time. So there!


The flanges on the cat were angled as shown in the pictures, allowing the exhaust to pass neatly down the side of the car. Rob also welded on some bolts so a piece of rolled aluminium sheet could be attached as a heat shield. Finally, I lagged the collector with exhaust wrap so there are no exposed pipes which might upset Vic Roads come registration.

Sunday, March 11, 2012

Oil catch and Expansion tank

We decided to place a small oil catch tank to connect vapour from the positive crank ventilation valve and the cam cover vent. This was bought from Car Builders Solutions who have supplied numerous bits and pieces during the build and who have always been extremely helpful over the phone and delivered very promptly. The unit is very small and the bracket was made simply by riveting an aluminium plate to two large hose clips which gripped the tank. The plate was shaped so it could be hose clipped to an adjacent chassis tube and the job was done. We ran the two vents via a Y-connector into the tank, and then ran the outlet of the tank into the the silicon hose behind the airfilter to remove excess vapour.

We have also added an expansion tank to the water rail to catch coolant when things get over excited. Again, it was a simple item from CBS, as above, and the bracket was a piece of bent aluminium attached to the mounting plate and padded with self adhesive foam. This then attached neatly to the from chassis cross member and is nicely out of the way. It is a bit low down and I'm not sure if it will return well when the radiator cools, but it is an underwater seal and the system should generate negative pressure so we'll see. At the least it will stop coolant from leaking everywhere.

Saturday, January 21, 2012

Bonnet hole

This was pretty much our biggest fear. A perfectly painted bonnet which needed to be accurately cut for a complex 3-D shape to stick through, without stuffing anything up. I am not in any shape or form artistic nor talented with hand eye coordination. I once made a matchbox holder at school which consisted of 2 pieces of wood nailed together and I couldn't even cut that straight. Dad did keep it, but I think because if he had it, no-one else could ever see it.
We made a template out of card to get a very rough form, leaving a lot of scope for expanding the hole later. We then used the dremmel for the initial cut, again keeping well within our markings and using lots of masking tape to protect against run away saws. Once we had this, we gradually expanded the hole using a metal file. It took a long time, mainly becauase I kept needing to lie down in a darkened room, but it did mean that we were in total control and could form the hole as desired.
Its shape on the right hand side evolved as we went along, and was initially going to be a straight edge, but the curves fitted beautifully over the airbox and also exposed the "Reverie" label. It looks quite nice even if we do say so ourselves! We finished it with a rubber edging strip from Clark rubber and job done. I can sleep once more....